Extensions
macOS Sequoia (15) and later
Click the Apple menu icon
 → System Settings.
Click General → Login Items & Extensions.
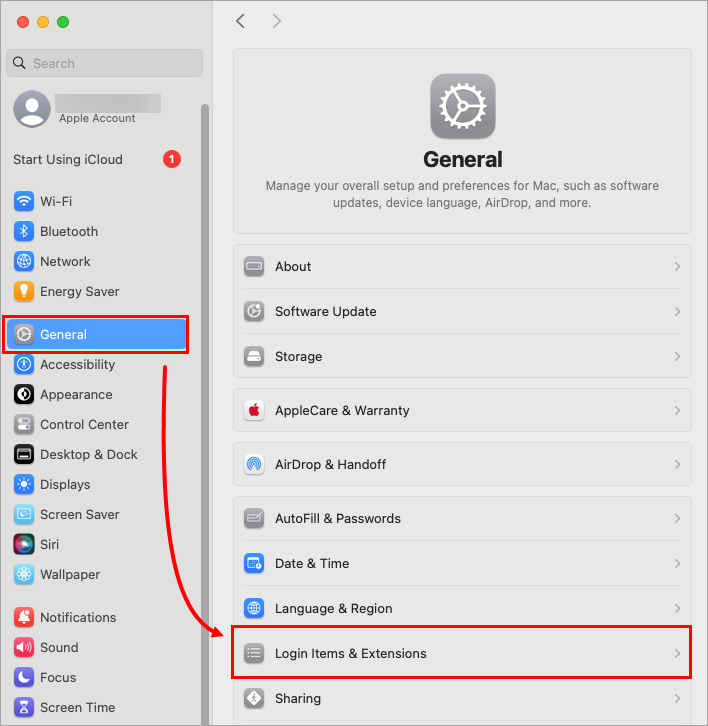 Figure 1-1
Scroll down to Extensions and click the information symbol next to Endpoint Security Extensions.
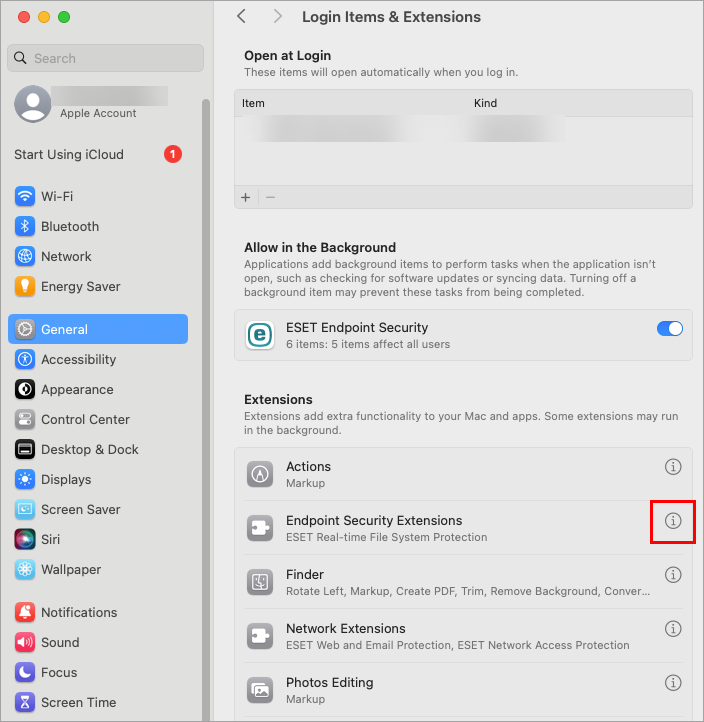 Figure 1-2
Click the toggle next to ESET Real-time File System Protection to enable it and click Done. You may need to use your Touch ID or click Use Password, then type your password and click OK.
You receive the "Failed to enable ESET Real-Time File System Protection: The authorization was denied" error
To resolve this error: Uninstall the product → restart your macOS device → Type the terminal command security authorizationdb write com.apple.system-extensions.admin authenticate-admin-nonshared → restart your macOS device → Reinstall your product.
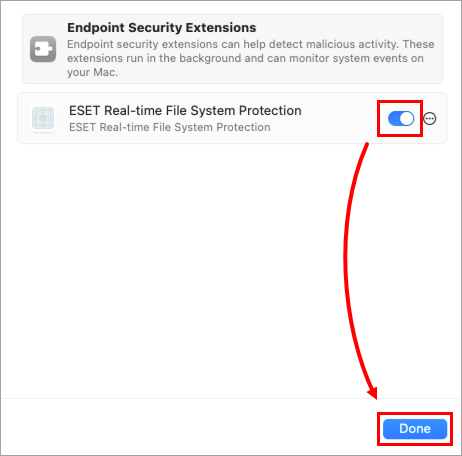 Figure 1-3
Click the information symbol next to Network Extensions.
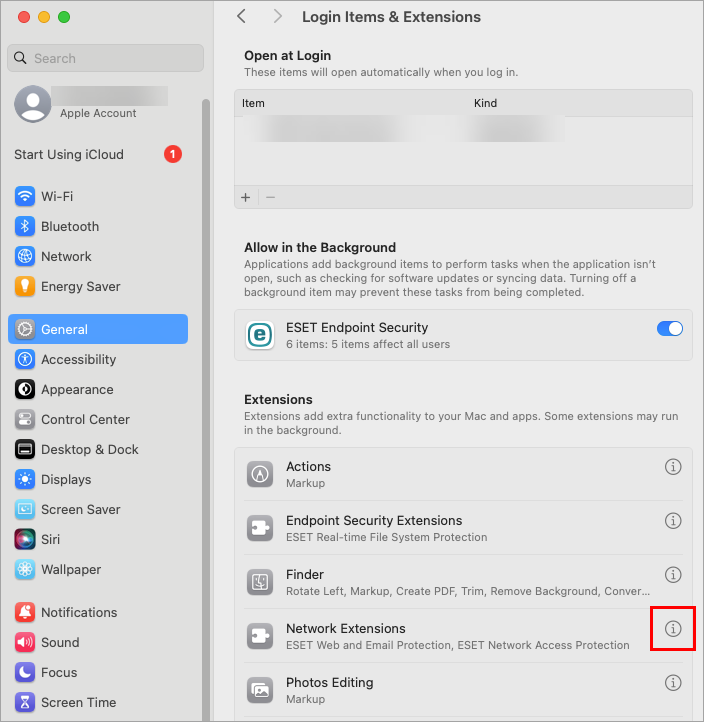 Figure 1-4
Click the toggles next to ESET Web and Email Protection and ESET Network Access Protection to enable them. You may need to use your Touch ID or click Use Password, then type in your password and click OK.
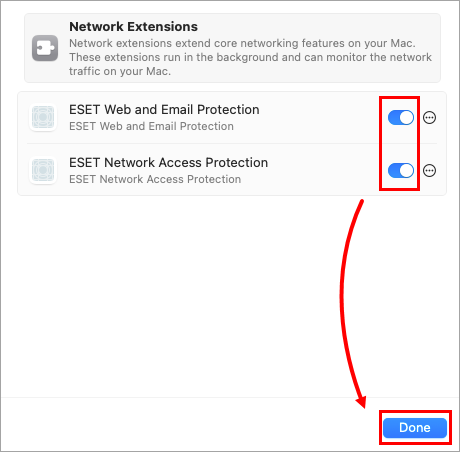 Figure 1-5
Click Allow when an ESET Endpoint Security alert requests to access data from other apps.
Click Allow when the ESET Web and Email Protection alert is displayed to add proxy configuration. If you do not allow proxy configuration when the alert is shown, you will need to restart your computer to initiate the alert and have the option to allow proxy configuration again.
Click Allow when the ESET Endpoint Security Would Like to Filter Network Content notification appears. Otherwise, the firewall will not work.
An alert window might appear, stating that your device is connecting to a new network. Select Private or Public for the network you are connected to and click Done.
Click the Apple menu icon
→ System Settings.Click Privacy & Security, scroll down and click the Details button next to Some system software requires your attention before it can be used.
If no Details button is present
If the Some system software requires your attention before it can be used note and the Details button are not present, the system extensions were already allowed and no further action is needed.
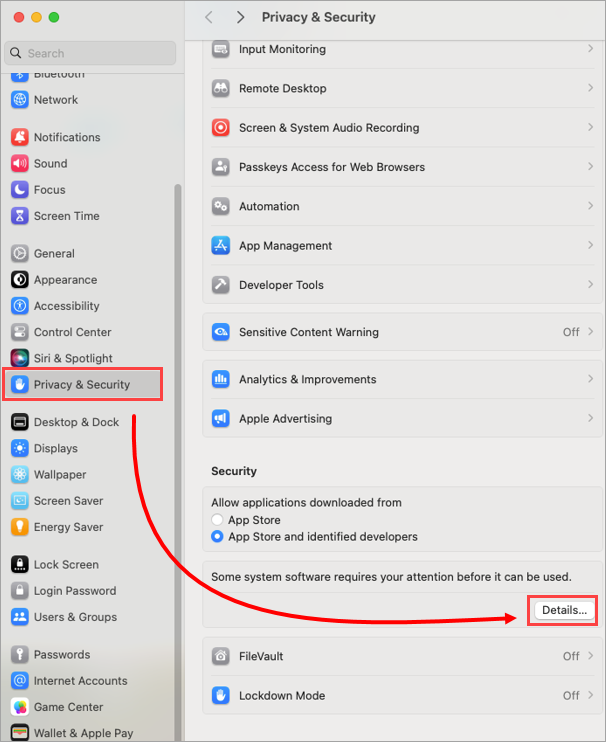 Figure 2-1
Type your Username and Password, and click Modify settings.
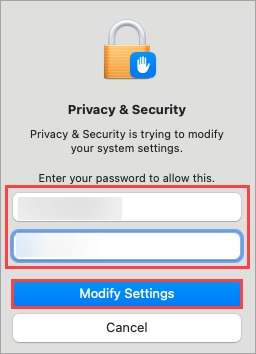 Figure 2-2
Click the toggles next to ESET Real-time File System Protection, ESET Web and Email Protection and click OK.
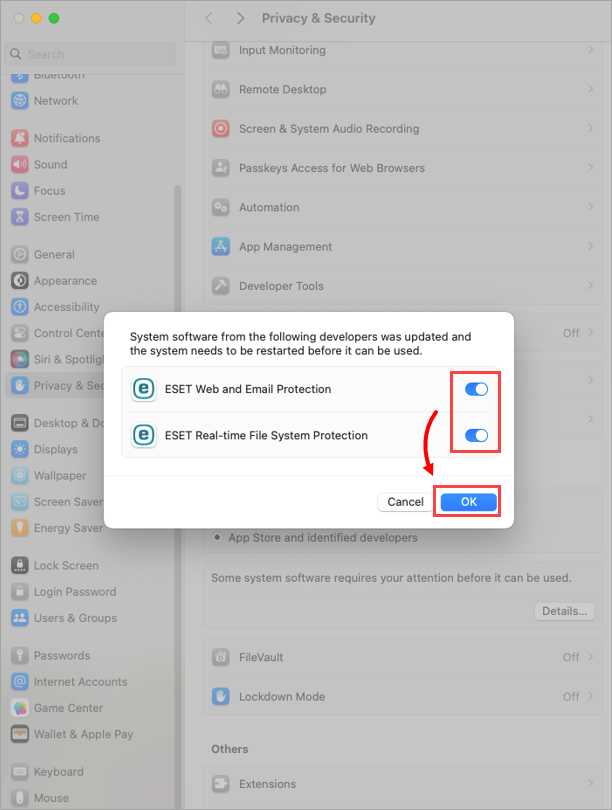 Figure 2-3
Click Allow when the ESET Web and Email Protection alert is displayed to add proxy configurations. If you do not allow proxy configurations when the alert is shown, you will need to restart your computer to initiate the alert and have the option to allow proxy configurations again.
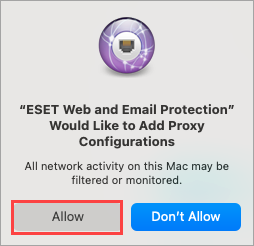 Figure 2-4
macOS Ventura (13) and later
Click Open System Settings.
If you do not see any notifications, in the top-right corner of the screen, click the Apple menu icon
→ System Settings → Privacy & Security.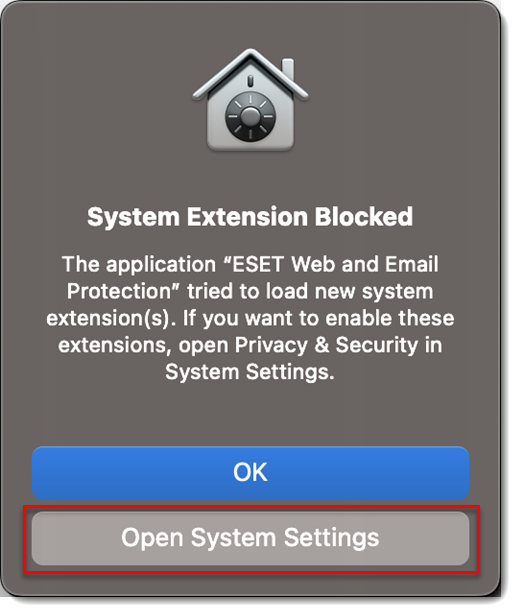 Figure 3-1
In the Security section, click the Details button next to Some system software requires your attention before it can be used.
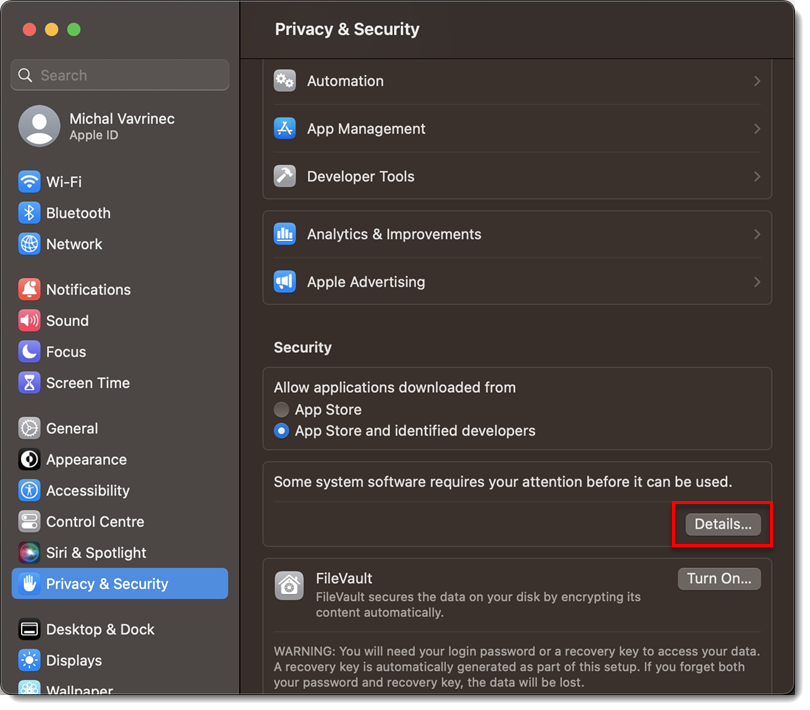 Figure 3-2
Use your Touch ID or click Use Password... and type your Username and Password, then click Unlock.
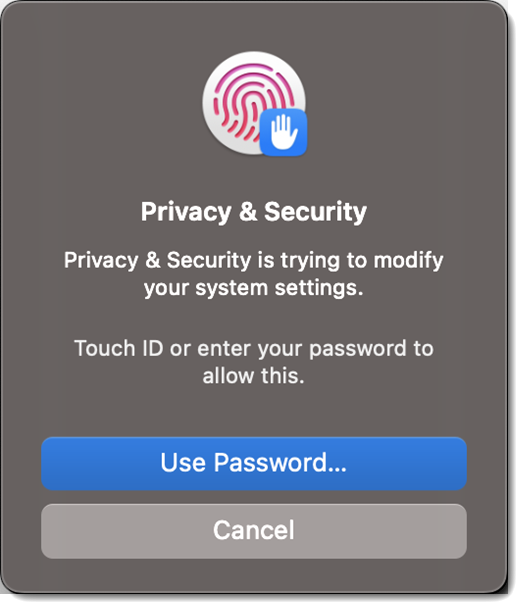 Figure 3-3
Click the toggles next to all ESET options and click OK.
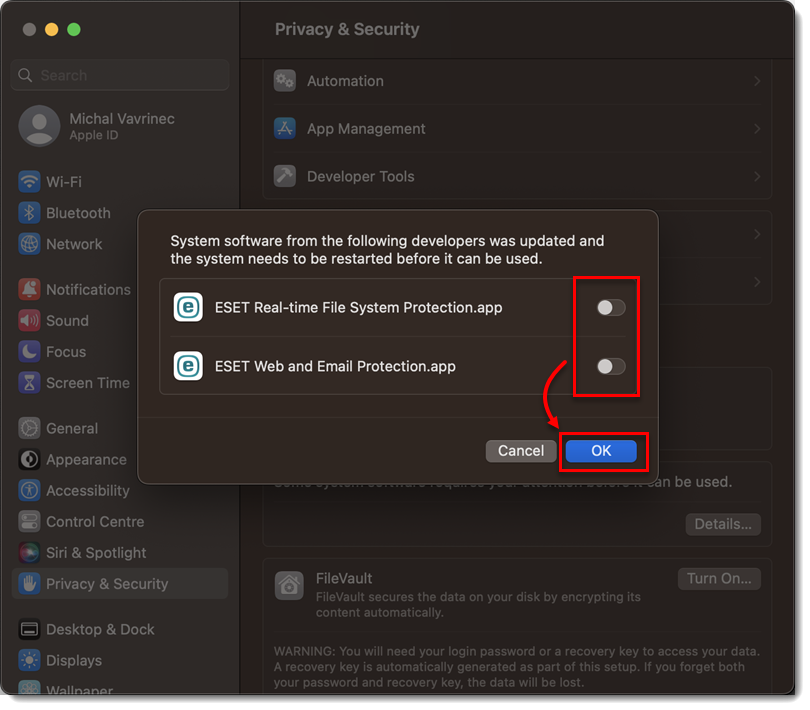 Figure 3-4
Click Open System Preferences or Open Security Preferences.
If you do not see any notifications, in the top-right corner of the screen, click the Apple menu
→ System preferences → Security & Privacy.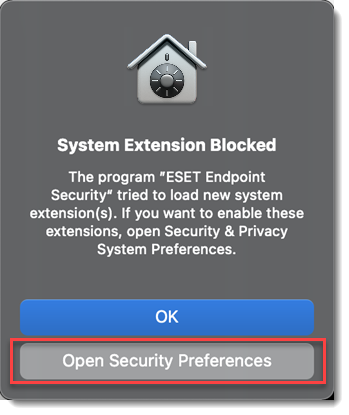
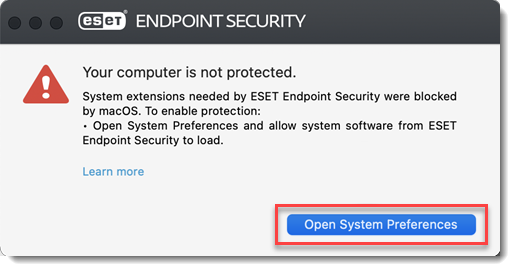 Figure 4-1
Click the lock icon at the bottom left to allow changes.
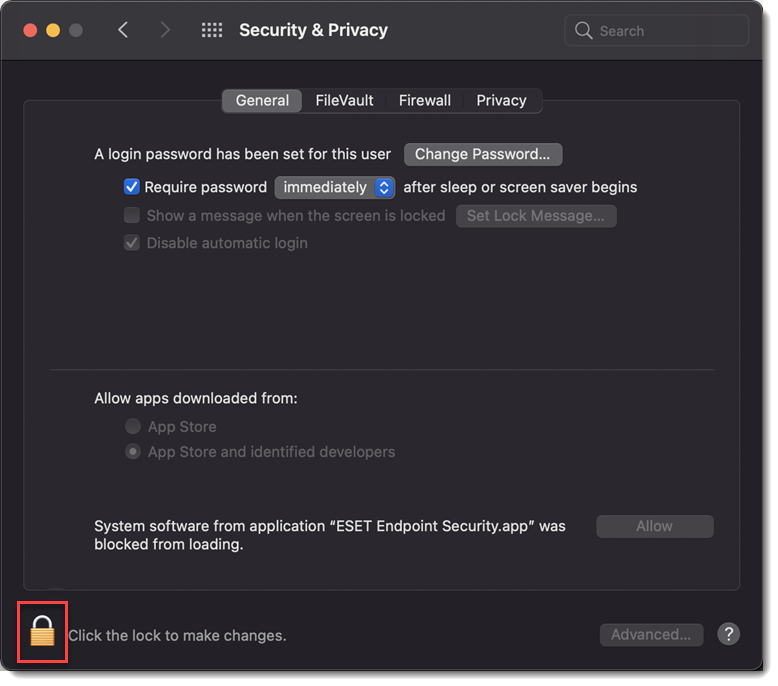 Figure 4-2
Use your Touch ID or click Use Password... and type in your Username and Password, then click Unlock.
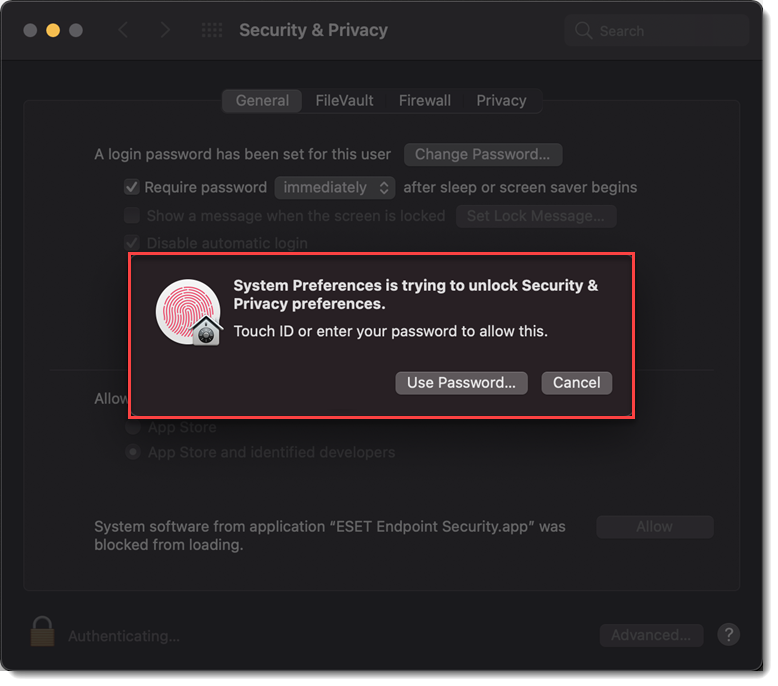 Figure 4-3
Click Details.
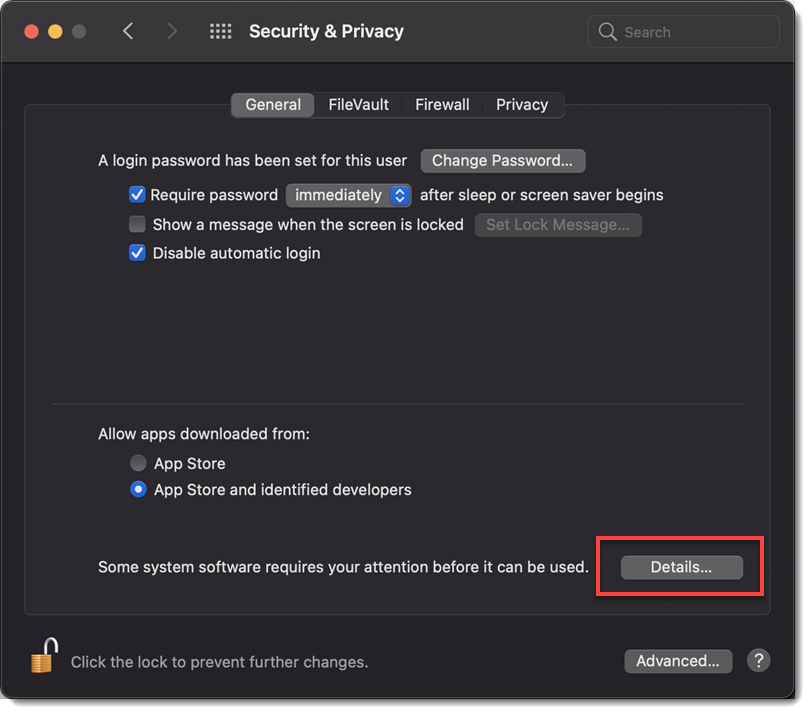 Figure 4-4
Select all the check boxes for your ESET product for macOS and click OK.
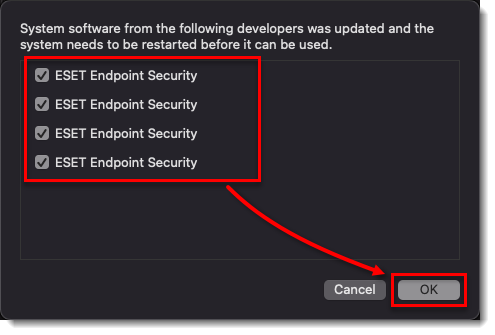 Figure 4-5
Click the lock icon to save and close the Security & Privacy settings, then restart your computer.